Friday 30 November 2012

The final day!

Good morning!
 
Well I can hardly believe it....November has just flown by and here we are
with our last project of the Christmas Countdown at Creative Craft World.
Mel has made a lovely 3D project and if you pop over to her blog
you'll find all the details here.
I hope you've enjoyed the projects the Design Team have made this month
and maybe even been inspired to try some of them yourself!
 
I will be back with some more of my own projects very soon
but this morning I'm off to take Lydia to her music exam.
Here's hoping it goes well!
 
Thanks for stopping by,
Sarah xx

Thursday 29 November 2012

Day 29 ~ Gift boxes

Hi everyone,
 
Today for the Christmas Countdown at CCW
Sue has made some fabulous cube boxes from one sheet of A4 card.
 
Check them out here!

Tomorrow is the final day of the countdown
so if you come back tomorrow, I'll have the link to Mel's blog
for her gorgeous 3D decoration.
 
Thanks for visiting :)
Take care.
Sarah xx


Wednesday 28 November 2012

Sparkle with LIM

Hello everyone,
I've been trying to get time since Saturday to play in the Less Is More
challenge this week and I finally managed it this morning :)
Chrissie & Jen are looking to see Glamour & Glitz!
 
I love glitter and all sorts of sparkly things so I couldn't miss this one :)
I have made a quick little Christmas card.

I love using kraft card for Christmas cards and this one is 12x12cms.
I stamped a little Elzybells robin, coloured him with copics and added Glamour dust underneath him
and a few dots of it around him. I also added white dots (inkessentials pen) around the frame.
The stamp is from a little clear set by Hampton Art.

-------------
 
Keeping with the Christmas theme, we are down to our last few projects over at
Creative Craft World....November has flown by!
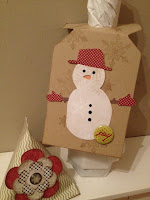
Today Lou has a bottle tag and gift carton to share.
Here's a little peek and you can find out how to make them here.
 
Thanks for popping in today
and I'll be back tomorrow with a link to Sue's project.
I have a couple of birthday cards to share soon but I have to wait in case they see them on my blog!
Take care,
Sarah xx

Tuesday 27 November 2012

Vintage Birthday Card

Hello everyone,
 
I don't have a card of my own to share today but I thought you
would enjoy seeing this card that my friend Freda gave me for my birthday yesterday.
 
I'm trying to persuade her to start a blog of her own so we can see the fabulous things she makes :)
 It has lots of texture and it even has a tiny charm hanging from the umbrella.
The photo really doesn't do it justice.
----------------------------------
 
I also have the link to Susi's blog where, as part of CCW's Christmas Countdown
she has made some really useful pocket handwarmers.
Just the thing for this cold weather!
To find out all about them click here.
 
 
I'm still in the process of catching up with your blogs,
I just wish there were more hours in the day sometimes!
See you soon :)
Sarah xx 

Monday 26 November 2012

Christmas Mini Envelope Book Tutorial

Hello everyone,
 
I hope your weekend went well, mine went far too quickly!
Well today is day 26 of the Christmas Countdown at Creative Craft World
and it's a special day for me as it's my birthday :)
 
I have a tutorial today for a little mini album made with envelopes.
I haven't it fully decorated inside but maybe it's just as well as this post
has a lot of photos already.


 I used 3 DL size envelopes and I like to use PaperMill Direct ones but any good quality ones will do.
To start you score each envelope down the middle.
 
Then fold in half (with the flap to the inside)with a bone folder to get a good crease line.
 
 Take a piece of scrap card and trace the outline of the flap.
This will make a template for cutting patterned paper for the flap as you decorate.
 
 Take one envelope for the front cover and lay it flap side down.
Add a strip of double sided tape from left to right approximately halfway down.
Take approx. 1m of ribbon, find the centre and adhere to the tape.
This is your ribbon closure.
 
Now you can decorate the back and front of the envelopes.
 
The paper I used for the front and back cover is Jillibean soup.
I inked all the edges of each envelope with 'Barn Door' distress ink.
 
Measure 1.5 cms in from the spine and 2.5cms from the top and bottom
and mark with a pencil.
Using the large hole in the cropadile punch through the folded envelope.
Using this envelope as a guide, mark the holes in the other 2 envelopes and punch. 
 
Layer the envelopes together and tie ribbon through the holes.
I left one end longer so I can loosen the ribbon if the book becomes a little bulky after decorating.
You can dab some wet glue on the ends to stop the ribbon from fraying. 
 
Before I decorate a book I always gather up as many matching embellishments as I can.
(A great chance to use up that hoarded stash...)
It really does make decorating a book a lot quicker if everything is at hand.
 
This is the first page of the book, I have tags to make for journaling on the left hand side
and I'll probably add more bits and pieces as I go along :) 
 
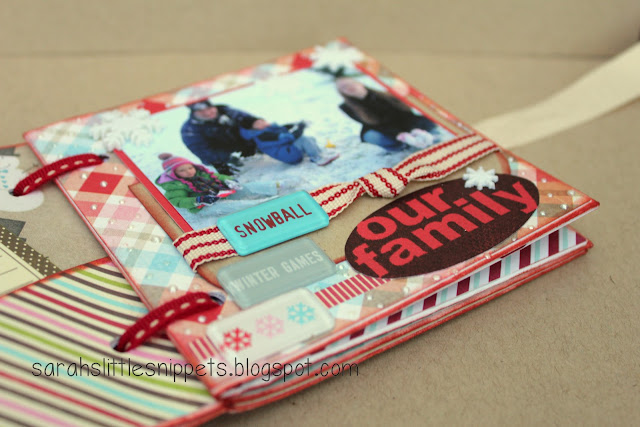
The second page is a pic of the family (except me...) enjoying the first snowfall one winter.
I still have to complete the journaling on the left hand side.
You can use the flap of the envelope for tucking in tags and little bits and pieces inside. 
 

When I get the book completely finished I'll post all the photos of the inside
so you will have a better idea of how it all comes together.
 
If you made it to the end of this very long post
THANK YOU!
I hope I have inspired you to have a go at your own little book
and if you do, please post a link in the comments section below - I'd love to see it :)
 
Don't forget to pop back tomorrow for a link to Susi's blog
where she has made some handwarmers.
These are great little things, I've made some for the craft fair coming up
and I've had to hide them because all the family want one :)
 
Take care,
Sarah xx

Edited to add: Rene from Simply Cute has used my tutorial to make a fabulous calendar.  You really must check it out!!!
Click HERE to see it. 

I'd like to enter this in the following challenges:
MIM ~ linky party
Challenges 4 Everybody #8 ~ anything goes
Corrosive Challenges ~ anything goes
CI Paints ~ anything goes
The Squirrel & The Fox ~ anything goes 

Sunday 25 November 2012

Christmas Countdown Days 24 & 25

Good Morning!
 
My internet connection has been terrible the past couple of days
so I'm hoping it lasts long enough to get this posted!
 
Yesterday and today we have 2 projects from Sarah W
for Creative Craft World's Christmas Coundown.
She has made loads of gorgeous inky tags and a layout.
If you pop over to her blog you'll see them here.
 
 
Tomorrow it's my turn again and I'll be posting a tutorial
for a mini envelope book
Here's a wee sneak peek...
 
 
I hope you're all enjoying your weekend
and all being well...I'll see you tomorrow :)
Take care
Sarah xx

Friday 23 November 2012

Day 23 Christmas Countdown at Creative Craft World

Hello again!
 
I was busy all day yesterday making some hot/cold bags for the craft fair.
They're small little bags that you heat in the microwave and put in your pockets to keep your hands warm or you can keep them in the fridge ready to put on knocks and bumps that little ones
(or even big ones!) can have.  I'll upload some pics soon.
 
I have a link today to Ali's blog where she has a Christmas tree project
for the Christmas Countdown at Creative Craft World.
You can see all the pictures and her tutorial here.
 
 
Thanks for popping in today and I hope to have something of my own to share tomorrow!
I'll also have a link to some Christmas tags.
See you soon,
Sarah xx

Thursday 22 November 2012

Yummy Christmas Treats!

Hello everyone!
It's day 22 of our Christmas Countdown at Creative Craft World
and it's Susi's turn to make a project and she has
made some delicious looking truffles.
 
You'll find all the details on how to make them here.
 
That's it from me today....I haven't a project of my own because I've agreed to do a craft stall
at the children's primary school and I've just 2 weeks to get some things made!!
Any tips on what I could make would be greatly appreciated :D
 
I'm still catching up on commenting so if I haven't been to see you yet
I will soon!
Take care,
Sarah xx 

Wednesday 21 November 2012

Notecard

Hello everyone!
 
I have a little notecard to share today using bits and pieces I cut with the Silhouette.
 
 
I added tape just along the top of the scallop strips and turned the scallops up slightly
to add a little dimension.
The stamp is by Clear Expressions (Hampton Art)
 
 
~~~~~~~~
 
I also have the link to Sue's blog
where she has made a beautiful wreath for the Christmas Countdown at Creative Craft World.
We only have a sneak peek but you can see it all and the tutorial here.
I can't wait to see it!
 
 
Thank you for stopping by today and if you come back tomorrow
I'll have a link to Susi's blog where she will have some homemade treats to eat!
 
Take care,
Sarah xx


Tuesday 20 November 2012

4 cards using CCW's November Mini kit

Hello again!
I just remembered last night that I had to post these cards for the new mini challenge at
We've been so involved with the Christmas Countdown that the regular challenges have been a bit forgotten about.
We'd love you to take a moment and enter your projects.
 
Lou very kindly sent me this month's mini kit to have a play with and with the gorgeous mix of colours, I was able to make a male card as well as more feminine cards.
 

 This cute little mouse is from The Paper Shelter, the sentiment is a Daisy Bucket stamp and the brad is K&Co.
 
 The sentiment on this card is computer generated using 'LoosieScript' and the oval is cut with Nestabilities.

 I 'm sorry I can't remember the make of this stamp.  To save on space I removed all my stamps from their wooden blocks and I never made a note of the names!
It's coloured with Koh-i-Noor woodless pencils.
The button is by Fancy Pants and I tied twine through it. 
The brads were stuck on with pinflair glue gel after I removed the pins from the back of them.
I find that if I'm placing brads close together on card it can be hard to get them in a straight line.
Also the card crinkles when I pierce holes closely together so I find gluing them on gives a neater finish :)
The sentiment is computer generated using 'PhontPhreak's Handwriting'.
 
The flower stamp on this card is by Elzybells and the button is American Crafts.
Everything else is from the kit.
 
Thank you for reading both my posts today,
I'm a little behind in my commenting but I will be round to visit you soon :)
I  hope you have a lovely day
and if you pop back tomorrow, I'll have a link to Sue's project.
 
Take care,
Sarah xx

I'd like to enter some of these in the following challenges:
Loves Rubberstamps ~ fun with ribbons
Oldie But A Goodie ~ anything but Christmas (Sailing card...stamp, brads, button, twine, more than 6 months old)
Incy Wincy ~ hip to be square (Sailing card)
Crafty Cardmakers ~ more than 1 punch/die cut (Flowers/butterfly card...2 die cut circles, 2 punched butterflies)
Whoopsi Daisy ~ die cuts and punches (Get well soon card... die cut oval, punched flowers & Flowers/butterfly card...2 die cut circles, 2 punched butterflies)
 

Day 20 Christmas Countdown

Good morning!
I have 2 posts to share today and this 1st one is
to tell you about Lou's gorgeous Christmas layout which she has made for the Christmas countdown
at Creative Craft World.
You can find all the details and have a closer look here.
 
Don't forget to check out my 2nd post which is cards I've made using this month's mini kit at CCW.
Sarah xx

Monday 19 November 2012

Jingle Bells, clean & simple Christmas card

Good morning everyone!
That's another weekend over...I hope you had a good one :)
 
We are continuing with the Christmas Countdown at Creative Craft World
(the DT have made festive projects for every day of November)
and it's my turn today.
 
I have made a clean & simple Christmas card which is based on the theme at Less is More this week.
It's to use 'hardware' on your card.


I bought the little bells from Meiflower at the craft show on Thursday and couldn't resist using them on my card today.
I cut and scored a white card blank and then cut another piece of white card and embossed it with snow dots embossing folder (not sure of the proper name but it's by Cuttlebug!)
Then I pierced holes on each side of this card for the brads.
 
 
I made jump rings from silver wire, put them on the bells and threaded them on the beaded string.
I tied the 'string' around the brads and then inserted them in the holes securing at the back.
The sentiment is computer generated using MTF Sweet Cheeks font, which I cut into a tag and tied a bow at the top.
I then layered it all on the base card with foam pads.
 
I hope you're enjoying our festive projects and I hope you'll come back tomorrow
when I'll have the link to Lou's blog for her project.
 
Thanks so much for popping in!
I hope you have a lovely Monday :)
Take care,
Sarah xx
Edited to add: I'm over the moon that the super talented Lisa M has chosen this project as her pick of the week at MIM!! I love my cabinet and it's nice that someone else does too :)

Edited to add again: I've just discovered that Lalkygirl has chosen this project as her pick of the week!! Do check out her beautiful cards and projects here :)

I am so happy today :)
 
I'd like to enter this card in MIM ~ linky party
 

Sunday 18 November 2012

Day 18 of the Christmas Countdown at CCW.

Good morning everyone!
It's a very quick post from me today and it's to send you to
Sue's blog where Guest Designer Tamsyn has made some gingerbread felt decorations.
You'll find all the details here.
 
A little peek of Tamsyn's project
 
Tomorrow it's my turn to share a project and I have a CAS Christmas card.
Hope to see you then!
Thanks for visiting :)
Take care,
Sarah xx

Friday 16 November 2012

Altered cabinet with drawers.

Hello again!
I'm back much later than I expected with this post....
 
 It's an altered cabinet that I made last summer at Crafter's & Co in Coleraine.
I didn't get it finished at the class but I enjoyed decorating it at home :)

I started by painting the cabinet with brown paint and then covering it with crackle glaze.
Once that was dry I painted over it with beige paint and it was brilliant to see the cracks appear as it dried.


The inside is decorated with various papers and the edges inked with distress inks.


The drawers are just perfect for storing metal bits and pieces, mini spools, antique buttons and some  fabric tapes.


I added rub-ons to the inside of the doors and some of the drawers.
The roses were made by tearing cream card in a spiral shape, inking with distress ink and rolling in a rose shape. I then added leaves, lace and buttons.


This is the cabinet before I started and it's made by Rayher hobby.


That's it from me...there are a lot of photos, but I hope you enjoyed them :)


I'd just like to remind you of the Christmas Coundown at CCW and Lou
has made some gorgeous tags here.
A wee sneak peek.

Thank you for visiting today,
I hope your weekend is going well!
Mine looks like it's going to be busy...I'd love a lie in, but I'm sure I won't get it..... lol
Take care,
Sarah xx

I'd like to enter this in the following challenges:
Craft Punked ~ anything goes
Paper Crafting Journey ~ anything goes
Simply Create ~ linky party
MIM ~ linky party


More festive creations at CCW

Hello again,
Lydia and I had a lovely day at the show yesterday but as usual spent far too much!
 
A quick post from me to give you the link to Ali's blog
where you'll see the Christmas card she has made for the Christmas countdown at Creative Craft World.
 
 
I'll be back this afternoon with an altered project!
Hope to see you later  :)
Sarah xx

Thursday 15 November 2012

Day 15, Trish's Christmas notebook

Good morning everyone!
 
We're now halfway through the Christmas countdown at Creative Craft World
and I'm amazed at how fast the time has flown by!
There's only 40 sleeps to Christmas......eeeek! 
 
Just a quick post today with the link to Trish's blog
where she has made a gorgeous notebook/planner.
Do check it out HERE.
 
I'd also like to tell you we're having a DT call too!
and if you'd love to join our friendly team
all the details are HERE.
Don't worry if you haven't any scrapbook experience,
I didn't when I started and now I love it!
No design team experience is needed either.
 
Well, that's it from me today, I don't have a project of my own today
because I was away yesterday and when I came home, I promptly fell asleep at 6pm and didn't waken until 6am this morning...I only went for a wee lie down!
I'm going to the craft show in Belfast with my daughter Lydia today...it's her first ever show so it should be fun :)
I'll be back tomorrow with a link to Ali's Christmas card and possibly something of my own....
 
I hope you all have a lovely day,
Take care
Sarah xx

Wednesday 14 November 2012

Pink Christmas Card

Back with my 2nd post today and I have a pink Christmas card.
A while ago I won a voucher to spend in The Paper Shelter and I've had great fun spending it.
There are so many digis to choose from, I hardly knew which ones to pick!
 
This is the one I've used for my card today.
 
It's a precoloured image but it also comes with just the outline for you to colour yourself.
My crafting time is limited at the minute so the precoloured image is very handy!
I inked around the edges of the image with Versamark and embossed with WOW embossing powder.
I also heat embossed a strip of pink card and then cut the snowflake with a Tim Holtz die.
It's really sparkly in real life!
I added Stickles to the snow on the log and around her feet.
Then I layered it on pink card, tied twine around and finished with a pink button.
Then layered it all on a pink card blank with foam pads.
 
Thank you for stopping by my blog today,
Don't forget to stop by tomorrow for Trish's Christmas planner!
Enjoy the rest of your day :)
 
Take care
Sarah xx
 
I'd like to enter this card in the following challenges:
In The Pink ~ pink CAS (I hope it's CAS enough!)
Bearly Mine ~ pink Christmas
Crafty Sentiments ~ Christmas
Hooked on Craft ~ Christmas no red/green

Day 14 and it's Origami Santas!

Hello again!
We're almost halfway through our Christmas Countdown at Creative Craft World
and Sue has some festive origami santas to share today.
They look like great fun and if you pop over HERE, you'll find out how to make them!
 
 
Tomorrow Trish has a notebook/planner which she has decorated using her Silhouette.
It really is gorgeous, so do come back and see it :)
 
I'll be back later this morning with a 'pink' Christmas card.
Sarah xx

Tuesday 13 November 2012

Envelope Pocket mini book

Hello everyone,
My project today is one I was asked to make for my friend who retired from teaching this year.
We met through crafting and she has been so good to me...like a second Mum!
Her daughters' asked me to make something that would hold notes/tags from people who had written
little anecdotes about their Mum.
 
I decided to go with a pocket book made from envelopes.
....this was my 2nd attempt....the 1st ended up in the bin....
 
I hardly know where to start to explain how I made it....lol
 
It's made with 5 pieces of chipboard - the front, bottom, back, top and flap.
I covered the pieces with My Mind's Eye 'Wild Asparagus' paper
leaving a 5mm gap between the joins.
The front flap was cut using a Tim Holtz 'on the edge bracket die' and I added
a magnetic closure on the inside of the flap and on the outside of the front before covering with paper.
 
 
The inside is made with envelopes joined together accordian style.
I took nine kraft envelopes (I find PaperMill luxury C6 really good quality) sealed them and then cut off one end.  Then with a circle punch, cut a large notch out of the cut end.
I inked around the edges with vintage photo distress ink and let dry.
Then taped the envelopes one on top of each other with DS tape.
 
 
I added the lace around the front of the album before taping the envelopes
to the inside on the back and front.
The flowers are Prima and the metal corners are from Forgetmenot Papercrafts in Belfast.
I added two little pins and a sprinkling of adhesive pearls around the flowers.
 
 
I printed the word 'memories' on matching paper and added it to the metal (Tim Holtz) frame.
I put the brads through the chipboard before covering the inside so the metal pieces wouldn't show.
If the book is now filled with the tags, I'll see if I can get a photo to show it finished!
 
I found it a challenge to make....on my first attempt the paper kept splitting at the joins.
I think the paper was just too wet and I was stretching it too much.
Apart from all that, I was pleased with it when I had it finished and I know that my friend loves it too and that's the main thing!
................................................
And now for the link to the next project.
It's day 13 and Lou has a gorgeous Christmas journal to share.
We only have a sneak peek and I'm dying to see inside.
You can find it HERE
 
 
Thank you for visiting today and a big 'hello' to welcome my new followers!
Tomorrow I'll have a link to Trish's Christmas project
 and maybe even have something of my own too :)
 
Have a lovely day,
Take care,
Sarah xx
 
I'd like to enter this album in the following challenges:
MIM ~ anything goes
Lady Anne's Challenges ~ anything goes
Love to Create ~ fancy edges
Stamps & Fun = creativity ~ anything goes
Tuesday Alchemy ~ anything goes
Oldie but a Goodie ~ anything but Christmas (all except the flowers are more than 6 months old)
Papertake Weekly ~ flower power