
I get asked quite often how I make my gift bags so I thought I would do a tutorial :)
There are a lot of photos but I've tried to make it as simple as possible and hopefully the pictures will explain it better than I can write it! If there's anything that is not clear, let me know and I'll try to help :)
It's made with 2 sheets of A4 card scored EXACTLY the same.

To start, lay your card portrait (short edge to the top) on your scoring board

Score at 5cm and 19 cm

Turn the card 90 degrees
anti-clockwise so the card is landscape.

Score at 21cm and 29cm.

Score at 25cm, down as far as 12cm from the top edge.
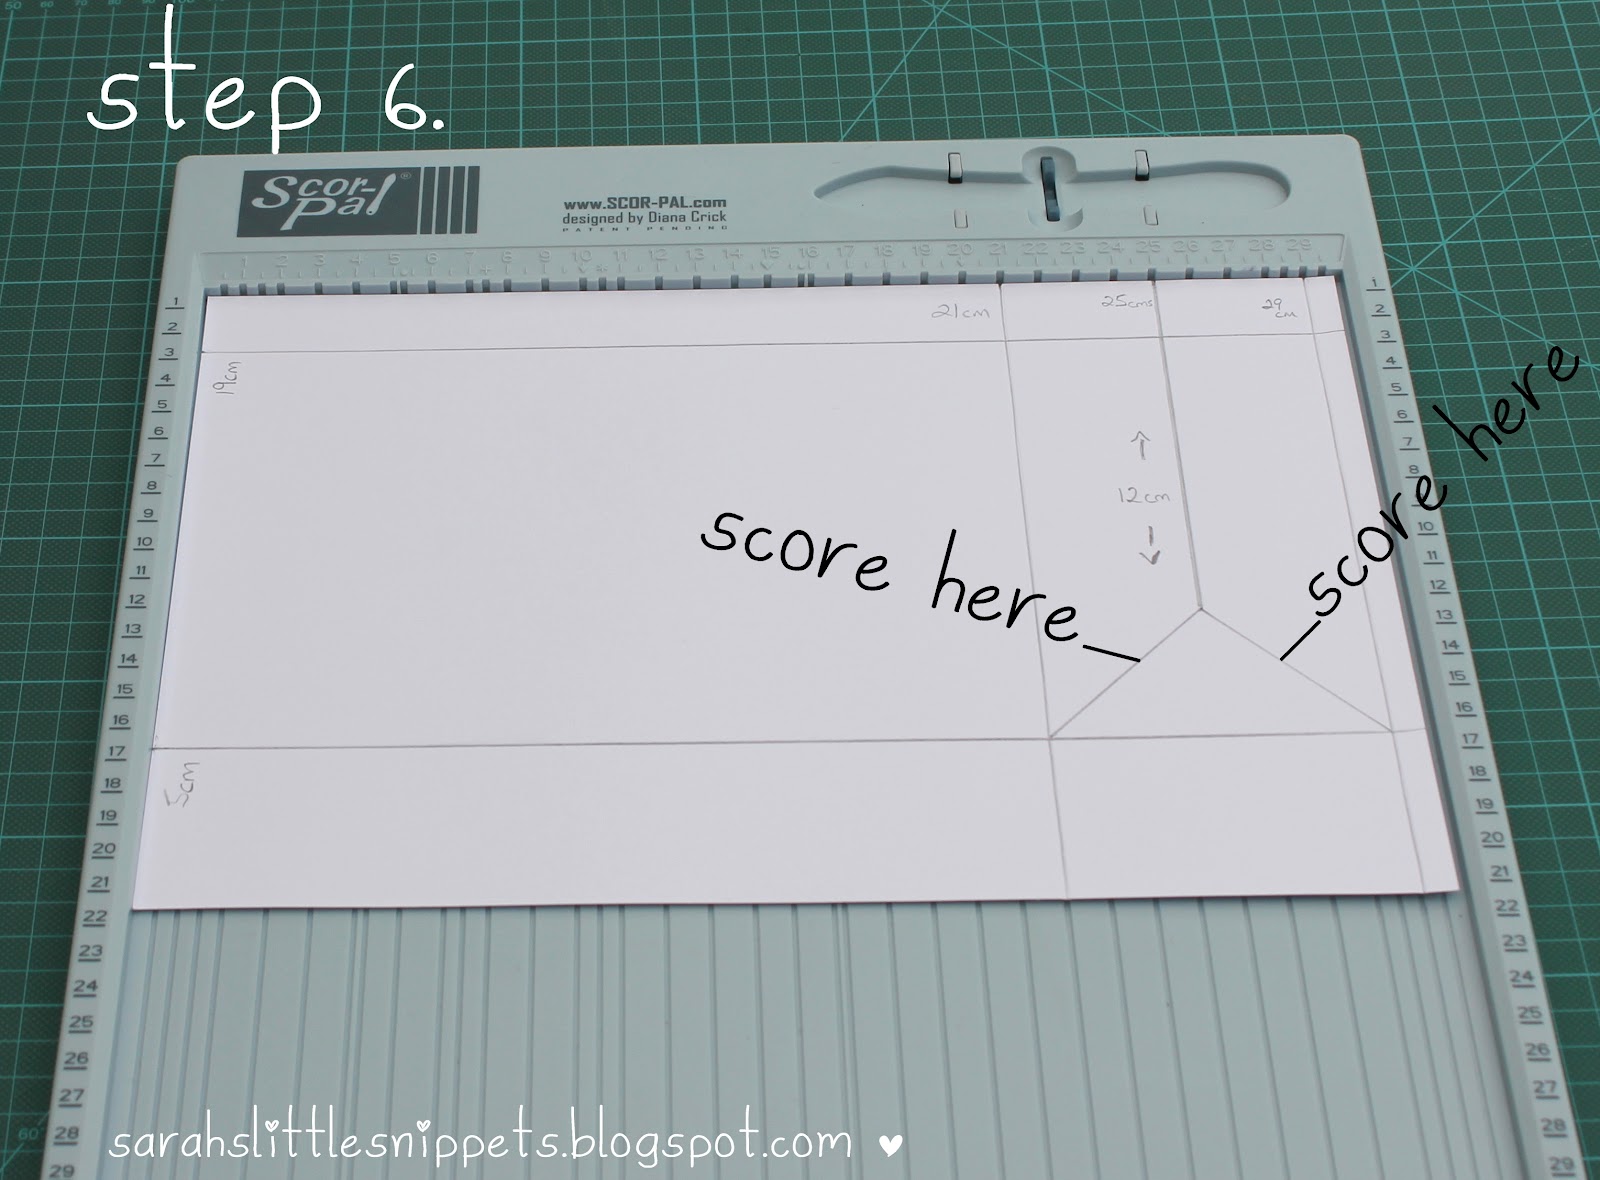
Score from the 12cm mark to the corner of the score lines to the left and right. You should have a triangle shape.
I have marked the score lines with a pencil so you can see them clearly.

Cut the card as shown in the picture.

Cut from the bottom up to the first score line.

Fold the top downwards along the score line and fold the bottom upwards along the score line.

Fold two of the vertical score lines towards the left.

Fold the centre score line back as shown in the picture.

Fold the triangle score lines back.

Turn the card over so the outside is facing up and apply tape to the small flap on the left.
Lay the two pieces of card side by side as shown in the picture.

Tape both together making sure to line up the top and bottom fold lines.
You can now stamp or embellish your bag.

Turn it over so the inside is facing up.


Fold the left side over and fold the right side over.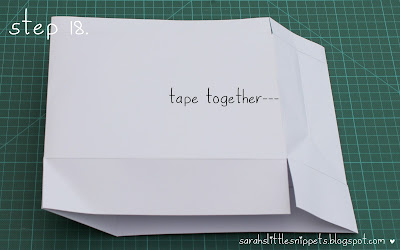

Tape together, lining up the score lines.
 Fold the top of the bag over creasing with a bone folder to give a crisp edge.
 Apply tape to the rest of the flaps as shown.
 Tape the bottom three flaps together.
 Tape the last flap closed.
 Now it's time to make the holes. Make a pencil mark at 1cm down from the top and 6cm from each side.
  Punch the holes with a Cropadile or similar hole punch. Repeat on the other side.
 Cut 2 pieces of ribbon the same size and tie a knot in one end of each. Thread the ribbon through the hole from the inside of the bag.
  Thread it back through the second hole and tie a knot in the end to secure.
 To make the bottom of the bag stronger, cut a piece of card 20.5cm x 7.5cm and tape it to bottom of the bag on the inside.
and that's it!
As this is a sample bag I haven't stamped or embellished it but at the end of this post I have included photos of some I've made before.
You can make larger or smaller sizes by just adjusting the measurements - just remember to start with 2 pieces of card or paper the same size.
I hope you find this tutorial helpful and if you do use it to make a bag don't forget to show me!!
Have fun :)
Sarah xx


made with 12"x12" paper


7 comments:
Thank you so much for these brilliantly clear instructions Sarah. This is such a useful shape and I'll definitely be making some!
What a great tutorial Sarah! This is something I will really be able to make use of. Thanks so much. X
Thanks for the fab tutorial Sarah, will give one a whirl when I get chance!
Helen x
Thanks Sarah and here is the link to the one I made from your tutorial, as requested
http://makingpapercrafts.blogspot.com/2012/03/bag-of-blossoms.html
Margaret x
Oh how did I miss this, thanks to Margaret mentioning a tutorial I came back to look. I'm pinning this on pinterest for future use :0) love the shape of this bag and your decorated samples are brilliant .
Jenny x
Brilliant detailed tutorial, thank you so much for sharing this. I know that I will be making a tonne of these.
Thank you
REally beautiful idea of pink flower printed bags! what a beautiful gift for wedding.
Post a Comment