Showing posts with label Altered. Show all posts

Friday, 16 November 2012

Altered cabinet with drawers.

Hello again!
I'm back much later than I expected with this post....
 
 It's an altered cabinet that I made last summer at Crafter's & Co in Coleraine.
I didn't get it finished at the class but I enjoyed decorating it at home :)

I started by painting the cabinet with brown paint and then covering it with crackle glaze.
Once that was dry I painted over it with beige paint and it was brilliant to see the cracks appear as it dried.


The inside is decorated with various papers and the edges inked with distress inks.


The drawers are just perfect for storing metal bits and pieces, mini spools, antique buttons and some  fabric tapes.


I added rub-ons to the inside of the doors and some of the drawers.
The roses were made by tearing cream card in a spiral shape, inking with distress ink and rolling in a rose shape. I then added leaves, lace and buttons.


This is the cabinet before I started and it's made by Rayher hobby.


That's it from me...there are a lot of photos, but I hope you enjoyed them :)


I'd just like to remind you of the Christmas Coundown at CCW and Lou
has made some gorgeous tags here.
A wee sneak peek.

Thank you for visiting today,
I hope your weekend is going well!
Mine looks like it's going to be busy...I'd love a lie in, but I'm sure I won't get it..... lol
Take care,
Sarah xx

I'd like to enter this in the following challenges:
Craft Punked ~ anything goes
Paper Crafting Journey ~ anything goes
Simply Create ~ linky party
MIM ~ linky party


Tuesday, 13 November 2012

Envelope Pocket mini book

Hello everyone,
My project today is one I was asked to make for my friend who retired from teaching this year.
We met through crafting and she has been so good to me...like a second Mum!
Her daughters' asked me to make something that would hold notes/tags from people who had written
little anecdotes about their Mum.
 
I decided to go with a pocket book made from envelopes.
....this was my 2nd attempt....the 1st ended up in the bin....
 
I hardly know where to start to explain how I made it....lol
 
It's made with 5 pieces of chipboard - the front, bottom, back, top and flap.
I covered the pieces with My Mind's Eye 'Wild Asparagus' paper
leaving a 5mm gap between the joins.
The front flap was cut using a Tim Holtz 'on the edge bracket die' and I added
a magnetic closure on the inside of the flap and on the outside of the front before covering with paper.
 
 
The inside is made with envelopes joined together accordian style.
I took nine kraft envelopes (I find PaperMill luxury C6 really good quality) sealed them and then cut off one end.  Then with a circle punch, cut a large notch out of the cut end.
I inked around the edges with vintage photo distress ink and let dry.
Then taped the envelopes one on top of each other with DS tape.
 
 
I added the lace around the front of the album before taping the envelopes
to the inside on the back and front.
The flowers are Prima and the metal corners are from Forgetmenot Papercrafts in Belfast.
I added two little pins and a sprinkling of adhesive pearls around the flowers.
 
 
I printed the word 'memories' on matching paper and added it to the metal (Tim Holtz) frame.
I put the brads through the chipboard before covering the inside so the metal pieces wouldn't show.
If the book is now filled with the tags, I'll see if I can get a photo to show it finished!
 
I found it a challenge to make....on my first attempt the paper kept splitting at the joins.
I think the paper was just too wet and I was stretching it too much.
Apart from all that, I was pleased with it when I had it finished and I know that my friend loves it too and that's the main thing!
................................................
And now for the link to the next project.
It's day 13 and Lou has a gorgeous Christmas journal to share.
We only have a sneak peek and I'm dying to see inside.
You can find it HERE
 
 
Thank you for visiting today and a big 'hello' to welcome my new followers!
Tomorrow I'll have a link to Trish's Christmas project
 and maybe even have something of my own too :)
 
Have a lovely day,
Take care,
Sarah xx
 
I'd like to enter this album in the following challenges:
MIM ~ anything goes
Lady Anne's Challenges ~ anything goes
Love to Create ~ fancy edges
Stamps & Fun = creativity ~ anything goes
Tuesday Alchemy ~ anything goes
Oldie but a Goodie ~ anything but Christmas (all except the flowers are more than 6 months old)
Papertake Weekly ~ flower power

Monday, 12 November 2012

Christmas treat bags

Good morning everyone,
 
I hope your weekend went well.
It's my turn again to create a project for Creative Craft World's
Christmas Countdown.
 
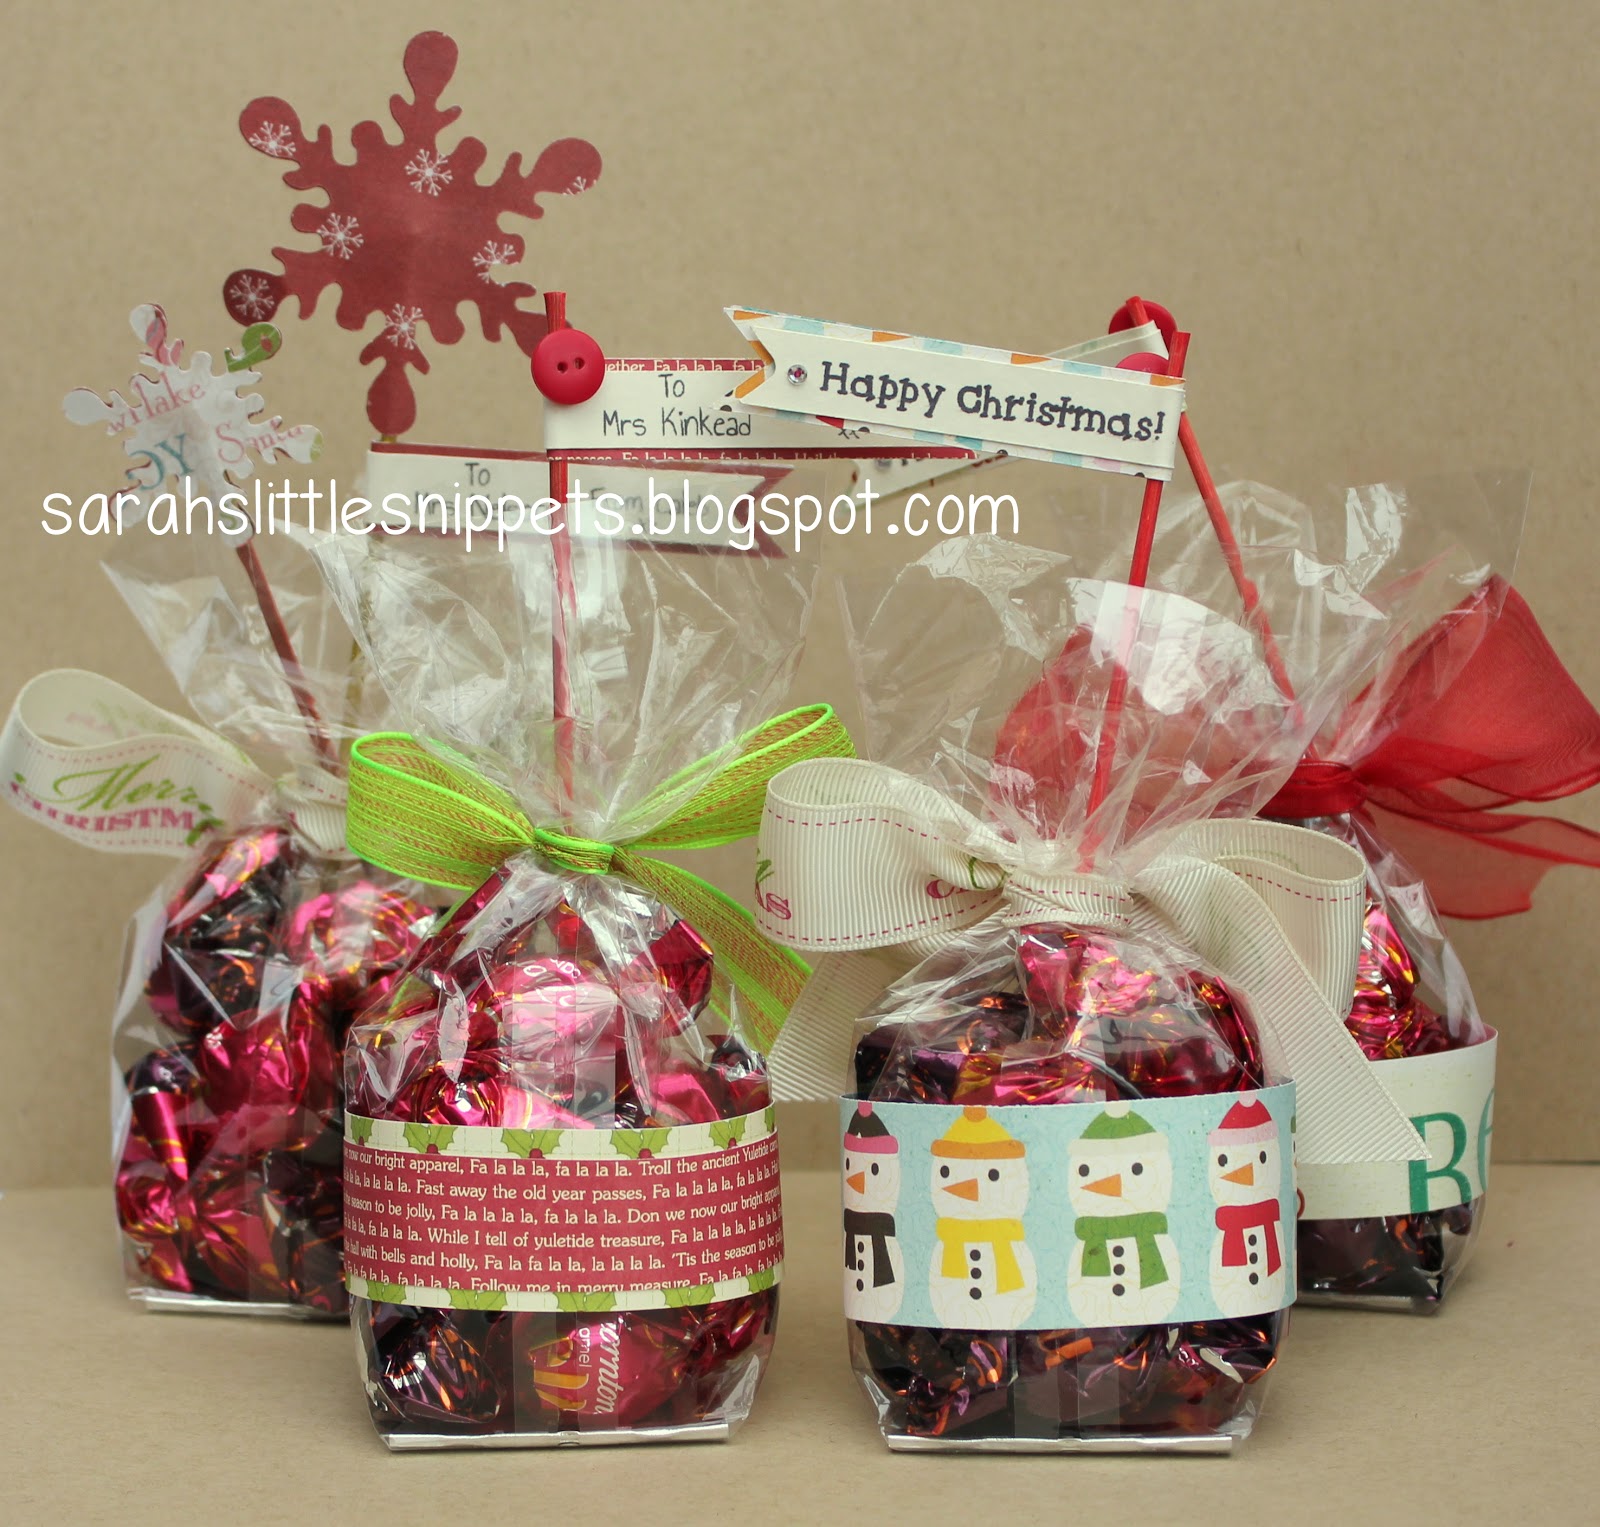
I like to make the children's teachers a little handmade gift at Christmas,
so this year I thought I would make some pretty packaging for some chocolates.
 
and here they are....
 
They are very easy to make!
 
You just take a cello bag (it's better if you can get one with a gusseted bottom or one with card in it like I have) and fill with chocolates.
It's very tempting having chocolates on my desk and I have to say they are YUMMY!!
 
For this bag, I just tied the top with ribbon and then made some toppers
with snowflakes cut out with my Silhouette Cameo.
Next, I cut two wooden skewers to size and coloured them with Copics.
Then layered the snowflakes with the stick in the middle and finished it with a button and some gems.
The banner with the sentiment was also cut out with the Silhouette,
wrapped around the stick and held in place with wet glue.
 
Regular readers of my blog may recognise this little gingerbread man from HERE.
 
I used the same cutting file and just reduced it in size before cutting him out of kraft card.
I layered two lenghs of Christmas paper together (one narrower than the other) and wrapped them around the bag, with the join at the front.
I covered the join with the gingerbread man, popping him up with foam pads.
The banner was made with matching paper with the sentiment on one side
and the to/from details on the other side along with a matching button.


 This 'Merry Christmas' ribbon is available to buy at Next!
 
 The back of the bags
 
The little banner - on one side 'Happy Christmas', on the other it's personalised with the teacher's name.
A wooden skewer, trimmed to size and coloured with a red Copic pen.
 
Supplies list
cellophane bags ~ with a gusset or a firm bottom (teehee...)
I got mine from a chocolate factory.
ribbon
chocolates ~ I used Thorntons Praline melts and Caramel melts
wooden skewers
various Christmas papers
buttons and gems
 
I hope you have enjoyed these little treat bags today,
and if you pop back tomorrow I'll have a link to Lou's blog where she will have a tutorial for a Christmas journal.
 
I'll also have a little project of my own that I made way back in the summer
but I'm only able to share it now, as it had to be kept secret!
 
Once again, thank you for stopping by today,
and I'll be catching up with you all later :)
Take care,
Sarah xx
 
I'd like to enter these in the following challenges:
MIM ~ always anything goes
Crafty Bloggers Network ~ Christmas anything goes
Forever Friends ~ ribbon and/or twine 
 

Saturday, 20 October 2012

Mini kit projects

Happy weekend everyone!
 
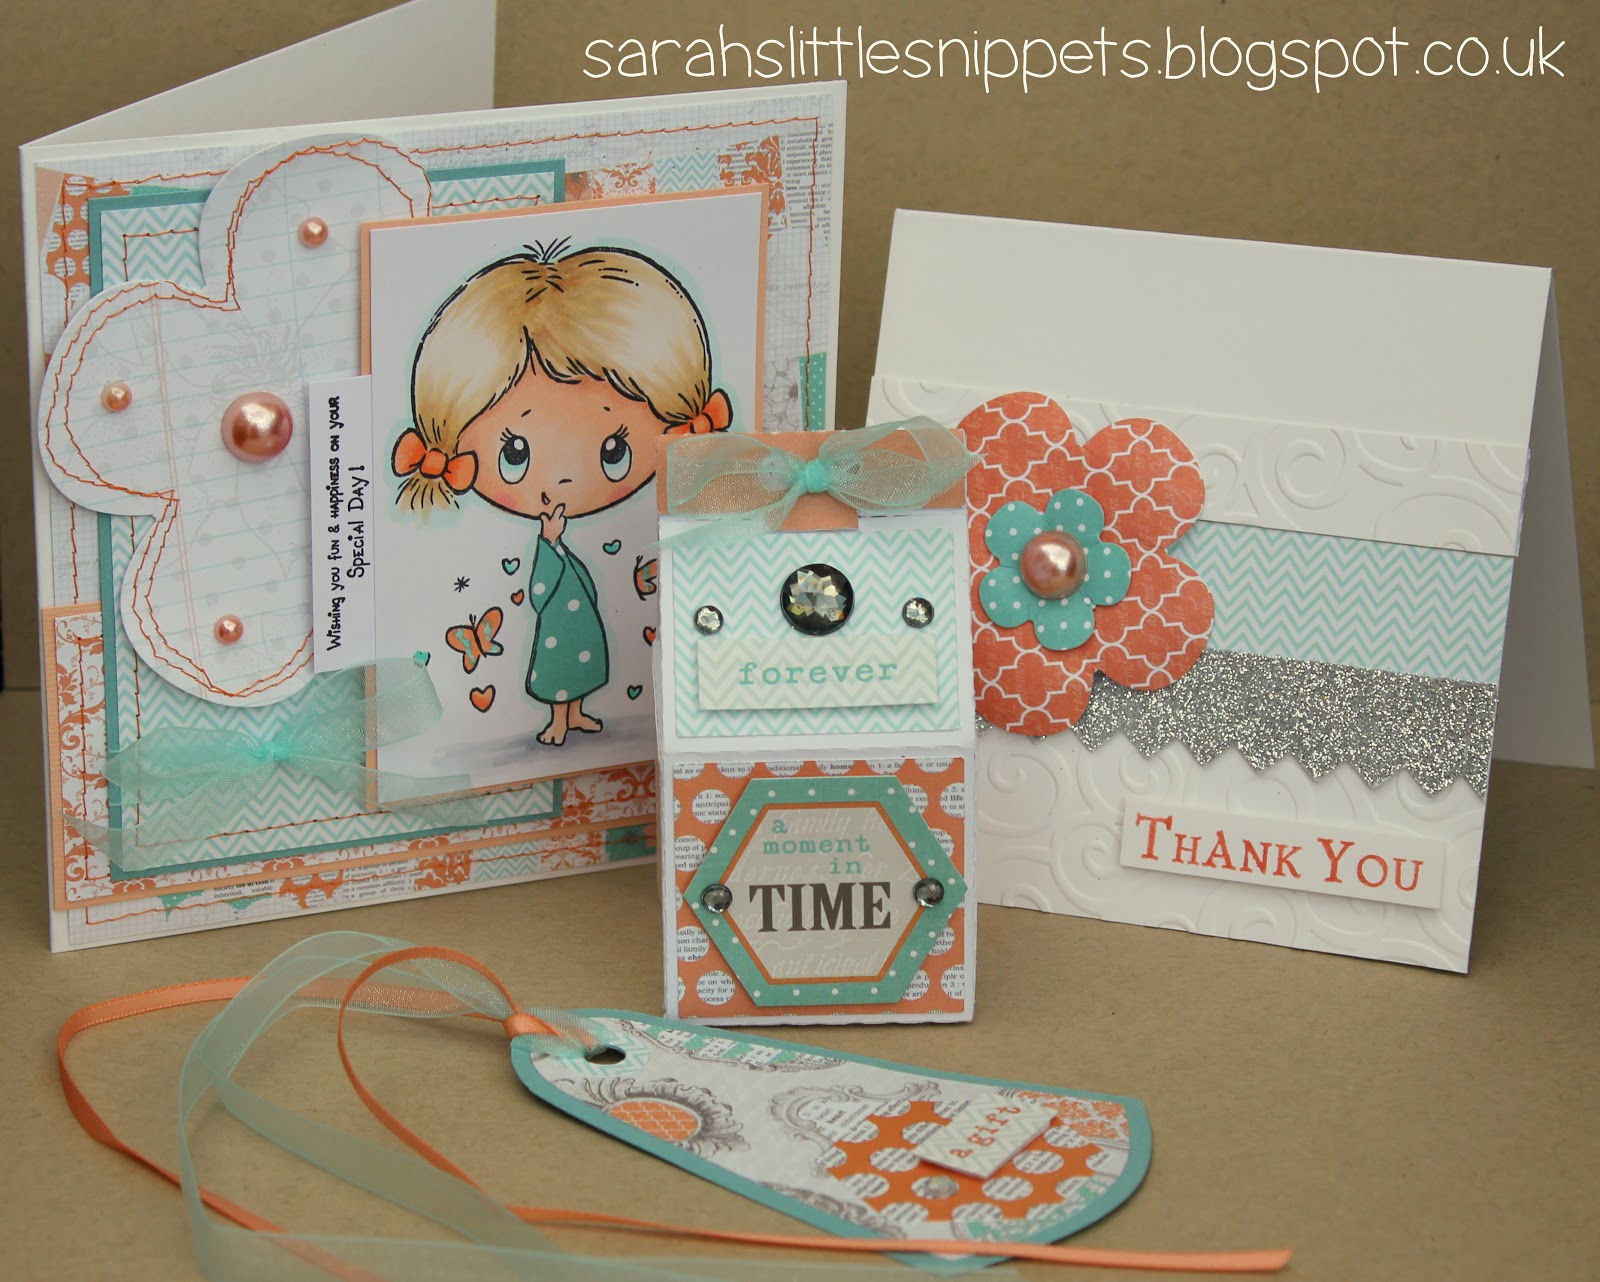
Today I have some projects I made using the October mini kit from Creative Craft World that
Lou very kindly sent me.
It is a mix of beautiful turquoise and orange from the Teresa Collins 'Tell your story' collection
~ you can see (and buy) the kit HERE.
 
 
All four projects and I still have lots left over to make more!


In the kit there are lots of beautiful die cut flowers.  I took the largest of them and sewed messy stitches around the petals with my sewing machine.
The image is a stamp from Crafter's Companion which I coloured with Copics and I took another of the large flowers and paper pieced her dress with it. The pearls are also included in the kit and the ribbon is from my stash.
The sentiment is stamped and was a freebie with a magazine(from last year I think).
 
close up of the layers on the card

 
 This card is very simple to make. I embossed the bottom of the card with a Cuttlebug 'swirls' embossing folder and added a strip of paper and a strip of glitter card from the kit.
I shaped the die cut flowers, layered them together and adhered them to the card with foam pads.
The sentiment is by Papermania and is stamped with a Stampin' Up marker.
 
 This mini carton was cut out with the Cameo and covered with paper from the kit. I then added stickers and gems which are also included in the kit.
I haven't put anything in the box yet but it would make a lovely little treat box filled with sweets or a scented candle.
 
...and lastly I made a tag, which I cut out with the Cameo.
I added a layer of patterned paper and a hexagon sticker (from the sticker sheet also in the kit) and a clear adhesive gem.
 
To enter the challenge, all you have to do is make a project with bling on it and make it smaller than 12x12".
The winner will be chosen by the Design Team and the prize is a fab mini kit, a generous discount at
Creative Craft World and a Guest Design Team spot.
So why not get creating!
 
Thanks so much for joining me today
and I'll be back soon with more.
Take care and enjoy the rest of your weekend.
Sarah xx
 
I'd like to enter the following challenges:
Make it Monday ~ anything goes
Stampavie #179 ~ stitches (1st card)
Perfect Sentiments ~ happy birthday/anniversary (1st card)
Lady Anne's challenges ~ anything goes (1st card)
Inky Impressions ~ anything but a card (Mini carton)
 

Wednesday, 5 September 2012

Rainbow Blog Hop with Creative Craft World

Good morning everyone!
 
Today it's my turn to share a project in our Rainbow Blog Hop
at Creative Craft World.
The reason for the blog hop is, it's the 6th birthday of  the shop on the 6th!
 
Blog hopping is all totally new to me so I hope you'll bear with me as I try to get the details right.....
 
My colour as part of the rainbow is Violet and I used these gorgeous papers from Echo Park
(springtime collection) 
 
Maybe I should start with my project and give you all the info at the end?
 
 
I started with a plain wooden 'bingo board' and painted it with gesso.
Next I took a sponge and inked the edges with seedless preserves distress ink.


Then I applied wet glue all over front of the board and adhered the spot paper, trimming the edges with a craft knife and sanding the edges.  I traced around the 'clip' part of the board on violet paper and cut the outline before gluing to the top of the board.  I covered the join in the two papers with patterned paper.
 
 
I covered the back of the board with matching violet paper.

 
For the notebook I took a narrow jotter and removed the front cover.
Taking striped paper I cut it to size across the width and 2.5" longer at the top which I wrapped over and taped at the back. 
I tied some green tulle around the cover and finished with a button which was threaded with twine.
I added punched butterflies and raised the wings with my favourite pinflair glue gel and a sparkly trail.

 
 The cover is double sided so it's just as pretty on the inside!


The word notes is cut from co-ordinating green paper with Cuttlebug 'red tag sale' dies and I brushed a white paint dabber across the board a few times before sticking them down.

The little metal clip at the top for hanging
 
and now for the blog hop details 
 
By this stage if you're following the hop we are on day 7 and you should already have hopped across 6 projects
but here's a reminder just in case you've come to mine first...
There's still time to take part (if you're new to it)
 
1. Red - Susi
2. Orange - Sarah W
3. Yellow - Michelle
4. Green - Trish
5.Blue - Ali
6. Indigo - Sue
7. Violet - me
 
and tomorrow, the final day - you need to visit Lou's blog
to find the POT OF GOLD at the end of the rainbow!
 
There are a few things you need to do to be in with a chance to win:
 
1. You need to visit each of the blogs listed above and leave a comment
2. Then visit Creative Craft World's blog and become a follower (if you're not already)
and that's it!
 
As part of this blog hop some of the team are offering a prize on their own blogs and
as a thank you for leaving a comment on mine I'd like to offer one too.
 
I am giving away the clipboard and notepad to one of my lovely followers!
(new followers will be included too but please only follow if you like my blog)
 
If you would like to be in with a chance to win it, all you have to do is leave a comment on this post.
If you want to leave a comment as part of the blog hop but don't want to be entered into my draw just put 'no draw' after your comment.
I won't be offended!
 
All the names will be put in the hat and I'll get Phoebe (my little daughter) to draw a winner next Wednesday (12th Sept).
 
I hope you will all take part in the blog hop
and thanks so much for visiting :)
Take care
Sarah xx
 
I'd like to enter this in the following:
Bearly Mine #51 ~ anything but a card
Jackson's digital expressions #21 ~ anything but a card
SOS #67 ~ wood element (clipboard)
Tuesday Alchemy #30 ~ anything goes
MIM #105 ~ linky party anything goes
Stamps & Fun = creativity #115 ~ anything but a card
The Crazy challenge #128 ~ seeing spots
Totally stampalicious ~ anything but a card
Unique Crafters challenge ~ anything goes
Natalie & Amy #1 ~ anything goes
Just keep on Creating #3 ~ anything goes 
 

Tuesday, 3 July 2012

UKS Blog Hop with Creative Craft World - an altered Recipe Box

Good Morning!

I hope you're keeping well today:)
I have to warn you....this is a long post!

It's the day of the UKS Blog Hop and I have made a project for Creative Craft World.
I'll keep it a surprise until you scroll on down..... :)

I've created a shopping list for the project at the bottom of this post
AND
as a special offer today only,
Creative Craft World are offering a huge 20% discount off everthing in store when you use the code UKSBlogHop
AND
if you place an order using the code, you have the chance to win one of CCW's fabulous kits.
AND
MME Howdy Doody Collection is on special offer today too!
(you'll see why later...)

When you visit the Creative Craft World shop you'll find everything on the left hand sidebar and remember to enter the code at the checkout!

and now for my project...

First you need a box with a lid.
This one is from Lidl (I think these Formil tablets are the best washing tablets ever!)
It's a good strong and sturdy box and it has the added bonus of having little tabs to keep the box closed.


Lightly sand the outside of the box with fine sandpaper ~ just enough to take the shine off it and make it easier for the paint to stick to it. 


 Next add a coat of gesso primer and two coats of white acrylic paint.
You really only need to do the edges of the outside and all 4 sides inside but I got carried away and covered the whole lot...!


When the paint is dry, you can cover the box with the paper.

I used My Mind's Eye Howdy Doody collection to create a whitewashed wood effect.
I measured all the sides of the box and cut the pieces from Beautiful Whitewash paper. I then adhered them to the box with this Stix 2 tape along the edges and a spread of tacky glue in the middle.
I cut two rectangles to fit inside the lid and the bottom of the box with
Beautiful Roses paper using the reverse side. 


I picked the heart and decorative round buttons from the Lovely Pins & Buttons set for the front of the box.
Because the box stays closed with the tabs the buttons are mostly decorative but I wrap the twine around them just for added security.

To attach the buttons, I sewed them on with Like twine. I placed the buttons on the box and marked through the holes with a pencil.  Then I pierced the holes with a pricking tool and sewed the buttons on, tying off the turquoise one with small knots at the back.


I sewed the heart button on and left two long lengths of twine and tied a bow twice at the front so it won't open. I clipped one of the lengths shorter and used the other for wrapping around the two buttons.


This is the finished outside of the box and I'll show the lid in more detail further down the post.

For the front I added two 'Lovely Small Stickers' to the bottom left corner and then cut a rolling pin with the Cameo and adhered it over the top.  I added 'baked with love' using print and cut.


For the back and sides I cut the flowers from 'Happy Decorate' paper and dry embossed them on the back with a paper shaper tool.  I adhered them to the box with Pinflair glue gel.
I dotted Papermania purple pearls among the flowers to match the MME rhinestones on the top.


I really enjoyed making the top of the box!
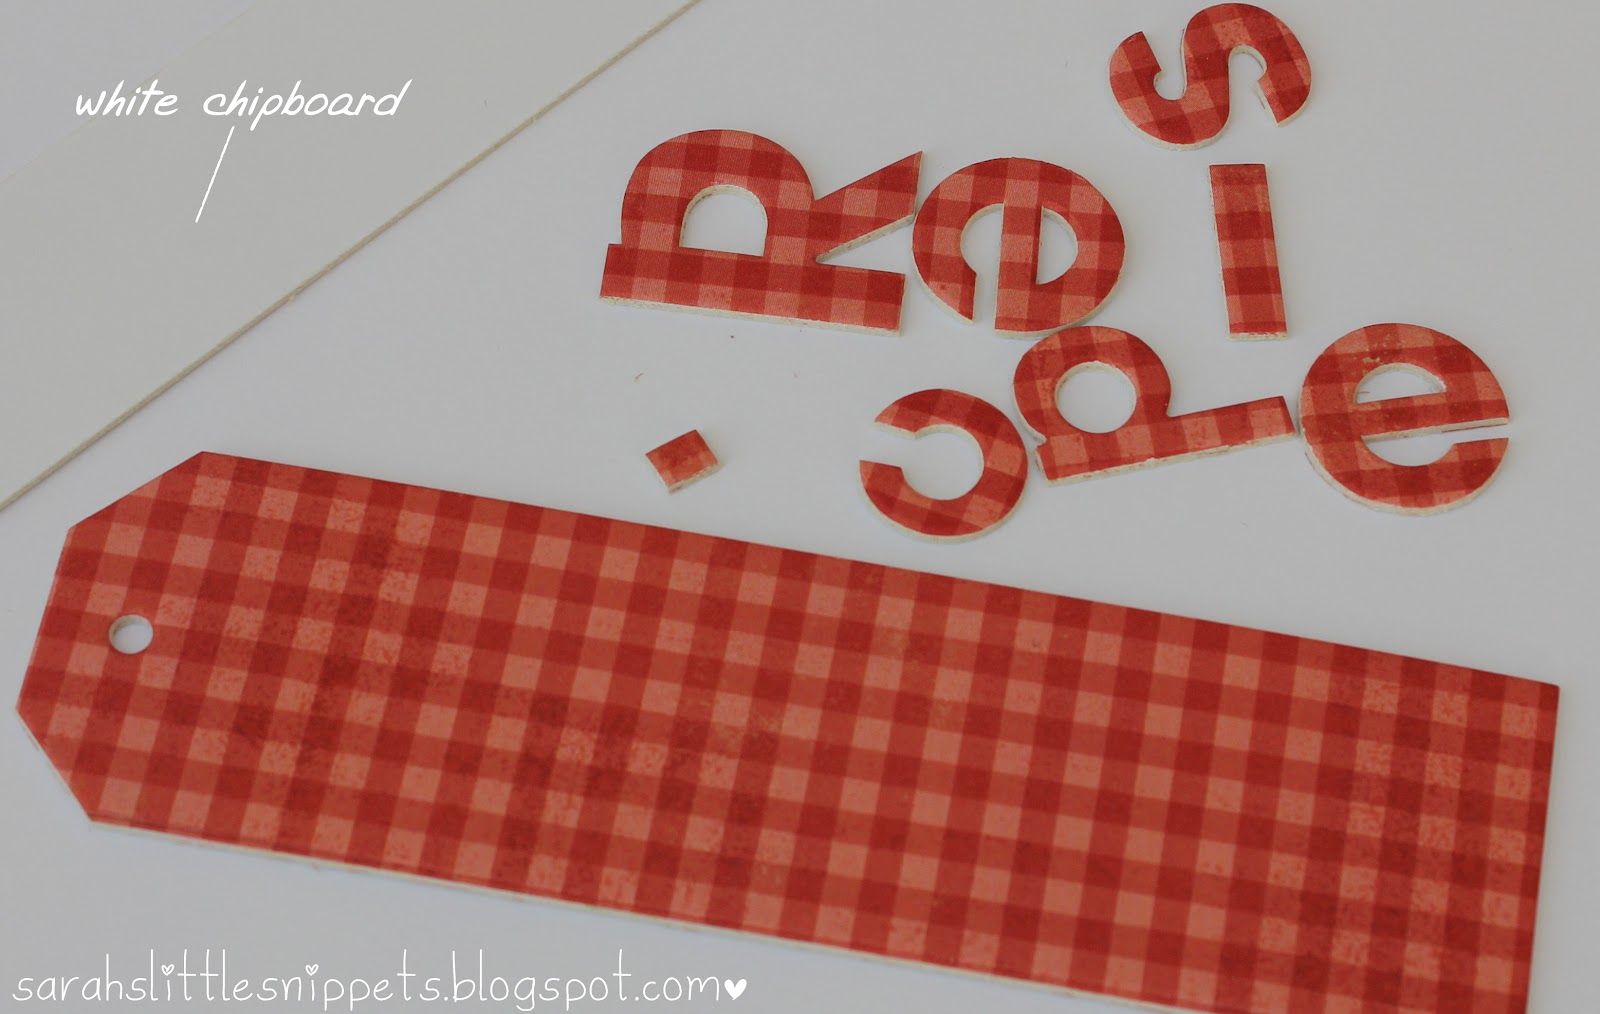
To make the letters, I glued the gingham paper to white chipboard (I got it from The Papermill Shop a long long time ago) and cut the letters and tag out with Cuttlebug 'Red Tag Sale' dies.
I layered the letters onto another piece of white chipboard on top of the tag and threaded lengths of 'Like Twine' through the hole at the end. Then I glued it all to the top of the box.

I'm not really a cook but I love baking! So I thought this would make a perfect box for all my sweet recipes :)  I took two stickers from the 'Beautiful Layered Stickers' set and added them just above the letters.  Then I tucked 2 pins underneath the round sticker, cut the rhinestone flourish in half and adhered it as shown in the photo.


The flowers were cut from 'Beautiful Roses' paper, dry embossed and shaped and then adhered on the top with Pinflair glue gel.


Inside the lid I added the 'Happy Wood Die Cut'  which I sprayed with Mister Huey misting spray in Calico White.
When it was dry, I stamped 'from the kitchen of'' using a Stampendous clear stamp
and then stamped ‘Sarah’ with Doodlebug alphabet stamps.
For the inside I made little divider cards and decorated them with the Howdy Doody papers.
I added embellishments from the list and stamped little sayings from various 'cooking themed' stamp sets.


As there is so much detail on these cards it is difficult to explain everything but if there's anything you'd like to know just email me or leave a comment (my address is on the side bar).


I think this post is already reaching mammoth proportions!


I cut the kraft divider card with the Cameo and doodled faux stitching back and front with a micron pen. 
So I can quickly find the recipe I need, I printed a numbered recipe list on white card and taped it to the back of each card.


This is one of the recipe cards I made in Word, using WordArt and text boxes.
The font is Blessings through Raindrops.
This recipe is one of my husband's favourites!


Even though the embellishements make the box top heavy, it is still sturdy enough to stay upright when the lid is open.


THANK YOU!
for making it all the way to the bottom of this long post.

It took me nearly as long to write the instructions as it did to make it.....lol

This little box has been a pleasure to make and I hope it has given you some inspiration.
They make fab presents.

Please send me a link or a photo if you do make one.
I'd really love to see it :)

I'm going to need some recipes to fill the box so it would be fantastic if you could send me your favourites! 

SHOPPING LIST ~ these are a real bargain today! Just remember the code UKSBlogHop for an extra 20% off the price.
2 Beautiful Whitewash
2 Beautiful Roses
1 Happy Decorate
1 Like Ledger
1 Like Twine
1 Lovely Pins & Buttons
1 Beautiful Rhinestones
1 Happy Wood Die Cut
1 Lovely Small Stickers
1 Beautiful Layered Stickers
1 Baby large Stickers
Baby Journal Card
Beautiful Journal card
Kraft card

 To follow the blog hop, you'll find all the details on the Creative Craft World blog here.

Thanks for for taking the time to visit today
and I'll be back soon :)
Take care
Sarah xx

I'd like to enter this in the following challenges:
Make it Monday #96 ~ anything goes
CBN Mon #1 ~ anything goes
Stampalot ~ what's your passion? ~ (mine is definitely altering things!)
Tuesday Alchemy #21 ~ anything goes