Showing posts with label Tim Holtz. Show all posts

Friday, 16 November 2012

Altered cabinet with drawers.

Hello again!
I'm back much later than I expected with this post....
 
 It's an altered cabinet that I made last summer at Crafter's & Co in Coleraine.
I didn't get it finished at the class but I enjoyed decorating it at home :)

I started by painting the cabinet with brown paint and then covering it with crackle glaze.
Once that was dry I painted over it with beige paint and it was brilliant to see the cracks appear as it dried.


The inside is decorated with various papers and the edges inked with distress inks.


The drawers are just perfect for storing metal bits and pieces, mini spools, antique buttons and some  fabric tapes.


I added rub-ons to the inside of the doors and some of the drawers.
The roses were made by tearing cream card in a spiral shape, inking with distress ink and rolling in a rose shape. I then added leaves, lace and buttons.


This is the cabinet before I started and it's made by Rayher hobby.


That's it from me...there are a lot of photos, but I hope you enjoyed them :)


I'd just like to remind you of the Christmas Coundown at CCW and Lou
has made some gorgeous tags here.
A wee sneak peek.

Thank you for visiting today,
I hope your weekend is going well!
Mine looks like it's going to be busy...I'd love a lie in, but I'm sure I won't get it..... lol
Take care,
Sarah xx

I'd like to enter this in the following challenges:
Craft Punked ~ anything goes
Paper Crafting Journey ~ anything goes
Simply Create ~ linky party
MIM ~ linky party


Wednesday, 14 November 2012

Pink Christmas Card

Back with my 2nd post today and I have a pink Christmas card.
A while ago I won a voucher to spend in The Paper Shelter and I've had great fun spending it.
There are so many digis to choose from, I hardly knew which ones to pick!
 
This is the one I've used for my card today.
 
It's a precoloured image but it also comes with just the outline for you to colour yourself.
My crafting time is limited at the minute so the precoloured image is very handy!
I inked around the edges of the image with Versamark and embossed with WOW embossing powder.
I also heat embossed a strip of pink card and then cut the snowflake with a Tim Holtz die.
It's really sparkly in real life!
I added Stickles to the snow on the log and around her feet.
Then I layered it on pink card, tied twine around and finished with a pink button.
Then layered it all on a pink card blank with foam pads.
 
Thank you for stopping by my blog today,
Don't forget to stop by tomorrow for Trish's Christmas planner!
Enjoy the rest of your day :)
 
Take care
Sarah xx
 
I'd like to enter this card in the following challenges:
In The Pink ~ pink CAS (I hope it's CAS enough!)
Bearly Mine ~ pink Christmas
Crafty Sentiments ~ Christmas
Hooked on Craft ~ Christmas no red/green

Monday, 27 August 2012

3-2-1 with Less is More

Good afternoon!
 
With the summer nearly over and the children returning to school on Friday
it's time for me to get back to blogging!
 
I love the Less is More challenges and Make it Monday and although I tried to get time to play along this summer it just didn't happen but on Saturday I had a little free time and this is what I made.
 
 
The challenge for LIM this week is a recipe and I used 3 words - 2 animals - 1 ribbon.
 
The base card is 14x14cms tent fold and I layered a pink 11x11cms square on top.
The little elephant is cut with a Sizzix die from an Echo Park 'hello summer' paper pad.
I inked the edges with TH antique linen distress ink and added a black brad for her eye.
The word 'sorry' is an Elzybells stamp (unfortunately not available anymore) and the 'I forgot' is part of a Personal Impressions stamp which I inked with an SU marker.
The wee bird is cut from a sheet of paper from the EP pad.

 
 I layered the elephant and bird with foam pads and I added two pads on top of each other just under the ear to prop it up a bit higher. Then I glued a strip of ric rac ribbon just underneath to 'ground' them.
 
 
When I finished that card (and making the most of my 'free time'...)
I made one for a boy.
 
The base of this one is cream card and I layered Bazzill kraft card on top.
The elephant is cut from an Echo Park 'note to self' paper pad.
My recipe this time is 3 words - 2 doodled lines - 1 animal
 
 
By this stage I should have been back to my 'mum' duties but I had been asked to make a baby card and I thought these little elephants would be perfect!
The photo is not great and the card is already away so I can't retake it but you'll get the idea :)
 
It's for twins Edward and Ruby.
 
This time it's on a 7x5" white card blank and I printed the sentiment on the computer
using 'annie use your telescope' font.
The names are stamped using Elzybells alphabet stamps with versafine black ink.
I added clear dew drops to look like bubbles.
 
That's it for today!
 but I'm going to schedule more posts for this week.
I have been doing quite a bit of sewing over the summer
and have also been to classes to make some christmas projects .
Rather than mix the papercrafts and sewing on this blog, I've created a new blog just for sewing.....Richard is laughing....
he says if I can't keep up with one blog how will I manage two!
Well, I'll just have to prove him wrong won't I!  lol
 
My new blog is dillydoodle (if anyone is interested click here!)
Here's a wee peek of my latest project...
 
 
Thank you for coming to visit today :)
See you soon
Sarah xx
 

Saturday, 4 August 2012

New scrap map at CCW

Hello again!

Oh dear, I'm not much good at blogging in the summer......
At the minute I've come down with the flu so I'm writing this post in fits and starts.

As it's the first Saturday in the month (can you believe it's August already!!) we have a new scrap map challenge at Creative Craft World.

This is my take on the sketch

 I used the 'Echo Park Hello Summer' kit and for once I didn't use my Cameo!
I tried to do some paint splatters (lol) with pink paint but I think more of it ended up on my poor laptop than on the page....

The sketch

I cut nine 1½" squares from 5 sheets of the double sided papers and inked the edges with antique linen distress ink. After adhering them to the page I added various sized buttons from Fancy Pants.


The photo is of  Phoebe crossing a wooden bridge at a beauty spot near our home.  She was petrified of the water rushing underneath it so Caleb crossed first and encouraged her from the other side. 
I can remember being afraid of this same bridge as a child and I'm still not keen on crossing it now!

The banner underneath the photo and the sentiments are stickers from the Echo Park kit.


The title is also made with stickers from the kit and I added a doodled string with black pen.  I pierced holes at the 'ends' of the string and put red brads through to 'pin' the string to the page.
To frame the whole page I added faux stitching ¼" from the edge using my Tim Holtz ruler as a guide.

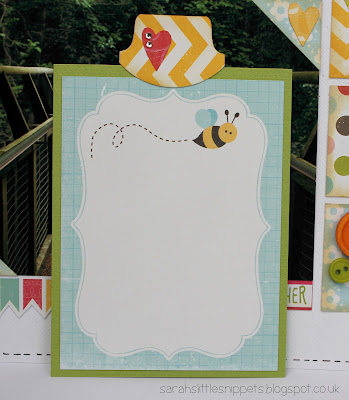
I haven't got round to adding the journaling to the page yet but I made this tag to hide behind the photo.  I cut one of the journaling tags from a sheet of paper in the kit and matted it on to green card.  Using my SU tab punch, I punched a tab from the chevron paper and taped it to the top of the tag.  I hand cut a heart and added 2 mini gems for a little bit of bling!

Don't forget there's still time to enter the mini monochrome challenge at CCW too.
You can find it here.

Thank you for coming to visit my blog today,
I can't promise I'll be back soon but I will be back as soon as I can :)
I hope you have a great weekend!
Sarah xx

Thursday, 24 May 2012

Vintage card with a Cardmaker's Delights topper

Good Afternoon!

Last week I had a lovely email from Tracy at Cardmaker's Delights
and she offered to send me a sample pack of the card toppers she sells.
I had a look at her website and jumped at the chance to have a play with them :)
They are excellent quality and the colours are beautiful.
I made this card using the topper from here.

It's for my Mother-in-Law for her birthday next month.


I started by distressing the edges of the topper with this little tool and then inked them with vintage photo distress ink.
I layered it on black card and distressed the edges of it too, then machine stitched them together.
The papers from a Prima Almanac 6x6 paper pad and I inked the edges of the cut pieces before machine stitching them.
The flourishes are cut with a Sizzix die and the layered butterfly with a Martha Stewart punch.
The lace, pearls, pins and button are from my stash and I tied black hemp twine through the button before attaching it with a glue dot.


The weather here is just beautiful and as I'm feeling much better
Mum, Lydia and I went for an early morning walk by the river, a short drive from where we live.
The sun was shining and the birds were singing, it was so good to get out of the house!


I really hope you are having a lovely day wherever you are :)
Thanks again for coming to visit
and I will have a Father's Day card to share tomorrow.

Take care
Sarah xx

I'd like to enter this card in the following challenges:
Divas by Design ~ flourishes
Just Keep on Creating #2 ~ anything goes + travel stories (Best holiday ever was St Lucia, beautiful scenery, delicious food, fantastic beaches, great company)
Penny's Challenges ~ anything goes
Bunny Zoe's ~ anything goes
Whimsy Stamps ~ vintage / shabby chic
Die Cuttin Divas ~ buttons, banner and / or birthdays (die cut used Sizzix flourish)
Party time Tuesdays ~ vintage or shabby chic
Sweet Stamps ~ anything goes

Monday, 20 February 2012

Mini Challenge at Creative Craft World

Hi everyone :)

It's the 20th of the month and that means it's time for the new challenge over at Creative Craft World.
I was given this month's gorgeous kit to work with and was delighted with the amount of goodies in it. It's great value for money!
This is what I have made with it (and I even have enough left over to make a few cards).  The only items I added to the kit were white card, some beads and a sheet of chipboard.

There are quite a few photos....

The book is made from an A4 sheet of chipboard, cut to size and covered in paper.   I wanted the patterned papers to match on the front and back, so I cut two 6"x6" sheets of paper in half and used plain bazzill card for the spine.

The mini kit from Creative Craft World

The title, butterflies and flowers were die cut using the Cameo.

I added a glue dot to the centre of the flower and spiralled the twine around it.  The quotes are computer generated and I found them on twopeasinabucket.com.

 The pink flower was a little bright for my photograph so I misted it with Mister Huey's misting spray in Calico white to soften the colour.  I added buttons to each of the tags which I cut out with the Cameo.


The cute little chicken sticker was included in the kit.


The butterflies were punched with the Martha Stewart butterfly punch and the wings raised up with pinflair glue gel. 

I cut the tiny flowers from a sheet of paper and added them to this page. 

The little butterfly is also a sticker. 

More Martha Stewart punched butterflies on this page.  

I love the quote on this last page :)  To tone the lilac flower with the background paper and the snowdrops in the photograph, I sprayed it with Mister Huey's mist in Calico white.  I added the different sizes of adhesive pearls to just about everything in this book - there were so many I just couldn't resist!

I added pink pearl beads to the twine between each page to allow room for the embellishments.

The tags (not finished yet!)  I added buttons to one side and flowers to the other.


 I really enjoyed making this book and I hope it will inspire you to have a go at making your own!

We would love it if you added your creations to the challenge this month.  You can make any project you like with a spring theme (cards, mini scrap page, book, altered item etc.) so long as it is less than 12"x12" in size.

I'd like to say hello to my new followers - you're very welcome!
Also, thank you to everyone who has left comments - it means a lot :)

Enjoy your day,
Sarah xx

I'd like to enter this project in
Make it Monday - anything goes
Pollycraft Monday - ribbons and buttons


Supplies
Mini kit - Creative Craft World
Chipboard
White card
Beads
Butterfly punch -Martha Stewart
Mini heart punch - x-cut
Ink for edges of card - Distress ink - Old paper
Quotes - various fonts
The size of the book is 6.5" x 3.5"

Wednesday, 4 January 2012

Altered wedding photo album


Hello again! This is the wedding album I made to go with the card from yesterday.  The flower paper is Bo Bunny - Alissa and the spot paper is Doodlebug. The bracket is cut from black card using a Tim Holtz on the edge die and the words 'Our Wedding' are cut with the Cameo (dear joe font). To cover the join in the papers I used white seam binding and baker's twine. The little flower is punched with SU's Boho blossoms punch and a little Papermania button added to the centre.
I forgot to take a picture of the album before I started but it was similar to the one at the bottom of this post here .


I made a box for the album with 2 sheets of 12x12" white card using the Woodware groovy duo scoring board (it's brilliant for making boxes).

The title and scrolls were cut with the Cameo and the box is tied with Baker's twine. The flowers are punched with SU Boho blossoms punch and a tiny pearl added to the centre.

You wouldn't believe how quiet it is here today, the children are back to school (not too happy about it either) and Richard's back at work....it's a little bit lonely!  Ah well, it'll not be for long :)
Yesterday while clearing the study I found some lovely stuff I'd forgotten about so I'm off to finish the study first and then have a wee play.

Hope you have a great day wherever you are, and thanks for visiting!
Sarah x 
  

Saturday, 9 April 2011

'Leaving' card using distress inks

Good morning :)

It looks like it's going to be a beautiful day here today so I'm doing a quick post before I hang out the washing!

This card is for a lovely man who is leaving his job and we are very sorry to see him go.  As he had officially retired a number of years ago, I didn't think 'retirement' on the sentiment would suit so I've put 'leaving' instead. 


The base is brown card cut to size (15x30cms) and scored in half. Then I cut a white square and inked it with Tim Holtz vintage photo and tea dye inks. The trees were stamped with peeled paint, shabby shutters, crushed olive and tea dye inks.

The sentiment is computer generated, cut out with an oval nestabilities die, inked and the edges distressed, then added to the square with foam pads.

The edges of the square card were distressed and faux stitching added with a brown pen.  I punched two 3/16" holes with a cropadile and added gold eyelets.  Then roughly inked some string and tied through the eyelets.  The finished square was added to the base card with foam pads.  I then used a craft scratcher to scrape around the square to make a distressed frame on the base card.

Thank you for visiting and I hope you have a lovely day wherever you are :)
Sarah xx

Supplies
Brown & white card - Papermill
Inks - Tim Holtz
Craft scratcher
Eyelets
String
Brown pen

Saturday, 2 April 2011

Mother's Day

Hello again :)

Wow! is it April already???  Isn't the weather gorgeous :)  We went to our local forest park today and it felt so good to be out in the fresh air.  It did the children the world of good too - they're sleeping like little logs tonight.

This card is for my Mother-In-Law and was made very quickly yesterday, just in time for the last post collection.  I really will have to be more organised, I still have my own Mums to make......


I cut white card (folded size 15x15cms) and matted designer paper on top.  I printed the sentiment on white card and cut out using a Tim Holtz label die.  I inked the edges, stamped some flourishes and added it to the card using foam pads.  Next I took some turquoise card and die cut the vine and adhered it to the card with wet glue.  I added a prima flower and a button, tied through with turquoise seam ribbon.  I finished the card off with some clear gems.

Have a lovely day and see you soon :)
Sarah xx

Supplies
White cardstock
Designer paper - Colorbok  'Woodhaven'
Ink - Versa color cube turquoise
Flourish stamp - Doodlebug 'Teen girl'
Dies - Tim Holtz 'Styled label' & Sizzix 'Vine'
Prima flower
Button
Seam binding ribbon
Clear gems

Tuesday, 1 February 2011

Covered notebooks and Clipboard calendars

Good morning :) 

I have to apologise for the state of these photos!!! I had been so busy making the books I didn't have time to take decent pictures of them and Richard took these ones while we were getting ready to go to the craft fair at our local primary school.   The first pictures are of little kraft coloured notebooks and pen sets which I covered back and front with various designer papers.  I think I mostly used Cosmo Cricket, October Afternoon, Doodlebug & My Minds Eye papers.
The die cuts on the front of each book (apple, hearts, strawberries, mushrooms, flowers, squares & circles) were all cut out with the Sizzix Big Shot using a mixture of Sizzix, Cuttlebug and Nestabilities dies. The word 'Notes' was cut using the Tim Holtz - Chip Block - decorative strip die.


MINI CLIPBOARDS
To make the clipboards, cut a piece of chipboard 3¾" x 4½"  and cover with paper.  Cover a mini bulldog clip with matching paper (I find using double sided tape the easiest).  Tape the calendar to the covered chipboard base and add your decorated clip to the top.  Tie matching ribbon to your clip and decorate the bottom of the calendar as desired.
The notepad is made using a pad of sticky notes and covering with plain or embossed card.  The sentiment 'A little note' is computer generated using 'Sophie' font and if you don't tape the notepad to the clipboard (just use the clip) you can replace it when it's all used up!


The little tags (tied around the top of the bags) were punched out with Stampin Up's Jewellery tag punch and the 'hand crafted' is from the Tiny Tags stamp set (I really love that set) It's stamped with Chocolate Chip ink.

Thanks for stopping by today and I hope to be back soon with some cards and maybe a mini book....!

Take care :)
Sarah x